Showing posts with label guest post. Show all posts

Friday, 3 August 2012

OTF: Many True Filofaxes Guest Post


Hi everyone! 

Here is a fantastic guest from Marcus, who wants to show us how 2 filofaxes used simultaneously works perfectly for him!

Enjoy!


MY TWO FILOFAX SYSTEM

As an Army officer I am, apparently, one of the original target market for Filofax. I have been a committed 'user' since being an Infantry Platoon Commander in 1996. I don't remember the model of the binder I had at the time, but it was Personal Size with 2 sets of rings (duplex?) and 2 heavy duty press studs. In a time of limited computer use at Battalion level, this served me well for many years. This was also a time when more Filofax inserts were available. I actually had and used many that were available, including the likes of  the 'Soldier Record Cards' to keep details of all my troops under command. As an Infantry Company Commander, I now have have over 190 troops under command,  more responsibility, a much faster pace of life and the curse of Email. my organisation system has therefore evolved considerably.

Anyway, scene setting – onto what works for me. My system consists of 2 Filofaxes, an A5 and a Pocket. Currently, both are Kendals, although the A5 was a City until recently. It had to be retired after 8 years of hard service (including two tours of Afghanistan!) and it now reclines on the bookshelf in my office looking after all my spare inserts. The Pocket Size is my analogue PDA and has been with me for 5 years now, hence the colour difference in the photo below.


The A5 Filofax
This is primarily my work Filofax. During the working day, I will have this to hand in the office, or in my daysack when I am out and about. It provides me with room to scribble and therefore think. The best thing about A5 size, is the ease with which I can print, punch and file documents. Whilst this is also possible in personal size, every page requires trimming, which can be a pain. In the Filofax I have the following:
ñ  Blank Notepaper – My 'Inbox' and capture tool when at my desk. I use standard (non Filofax) quadrille paper which I punch to fit.
ñ  Actions, Projects, Waiting and Agenda tabs. These are based on GTD and are mostly extracted from the DIY Planner kits. It is also the most worked part of the Filofax and I can quite easily fill (but also cross off) 2 sides of 'Next Actions' for the office in one day. This is also where I keep track of tasks that I have delegated to my Platoon Commanders. Personally, I find pure GTD too detailed, meaning I spend more time scouring my lists of next actions than actually doing stuff. I have settled somewhere  between the minutiae and the big picture which seems to work for me. (I can expand on my system in a later conversation if anyone is really interested).


ñ  A Reference Tab (although I called it Info), which has further tabs behind, dividing up information along Military Staff Functional Areas. This is the information I need to hand most days, either in the office, or in meetings, but probably not in between.


ñ  Towards the back are the ubiquitous card holders, along with a zip wallet containing my passport and various other paperwork.
ñ  Finally, right at the back, in the pocket designed for the Filofax Notepad, I keep a Moleskine Cahier for taking notes that I need to keep. These will either be meeting notes, or the regular download from the notes section in either the A5 or the pocket. I find that I am less 'prissy' about cahiers than the posh notebooks, so am more likely to use it. I also find that when using squared notebooks, you can rotate it 90 degrees and have almost an A4 / letter sized page if you need yet more space to think.


The Pocket Filofax
This goes everywhere with me and is the core of my planning function. Although it is not truly 'Pocket' sized, my uniform has cargo pockets on the legs, which are designed for carrying notebooks and maps. Out of uniform, I tend to wear cargo shorts in the summer and a jacket in the winter. Carrying the Pocket Filofax is therefore not an issue. Because I always have it with me, I always have somewhere to jot notes, or information I need to hand. In it I have the following:
ñ  Blank notepaper, for jotting general information and capturing ideas.
ñ  Actions, Projects, Waiting and Agenda tabs, as per GTD. These are mainly for personal projects and tasks and although a duplicate of the system in the A5, the contents are different.


ñ  A Reference Tab which has information I need to refer to regularly (my Company Nominal Roll, Battalion Telephone List etc). These are shrunk and punched to fit.
ñ  A home made month on one page calendar (inspired by the templates on Philofaxy)


ñ  A Filofax standard week on 2 pages diary.
ñ  The standard card holders, containing stamps and post-it page flags.
ñ  A clear slip envelope for receipts with a number of Post-It style sticky notes.

With a few useful tips, tricks and hacks, the pocket Filofax is almost enough to run my life, albeit in miniature. During my most recent 7 months in Afghanistan I found that I very rarely used my A5. Because the IT system was classified SECRET, printing and punching documents was avoided. Therefore my pocket Kendal, a Moleskine Pocket Notebook and access to the IT system, were all I really needed and helped me reduce the 'combat' load when travelling. For those of you thinking about using a Pocket Filofax,or struggling with one now, the following may help you get round the size issue:

Don't try to carry too much:  Rather than carry a whole year's worth of diary, carry a few months of week to view, and the rest on month per page. You can still make a note of appointments far in the future, but carry a lot less bulk. If you use day per page, again, carry 2 weeks worth of DPP, a couple of months of 2DPP and the rest on month per page.
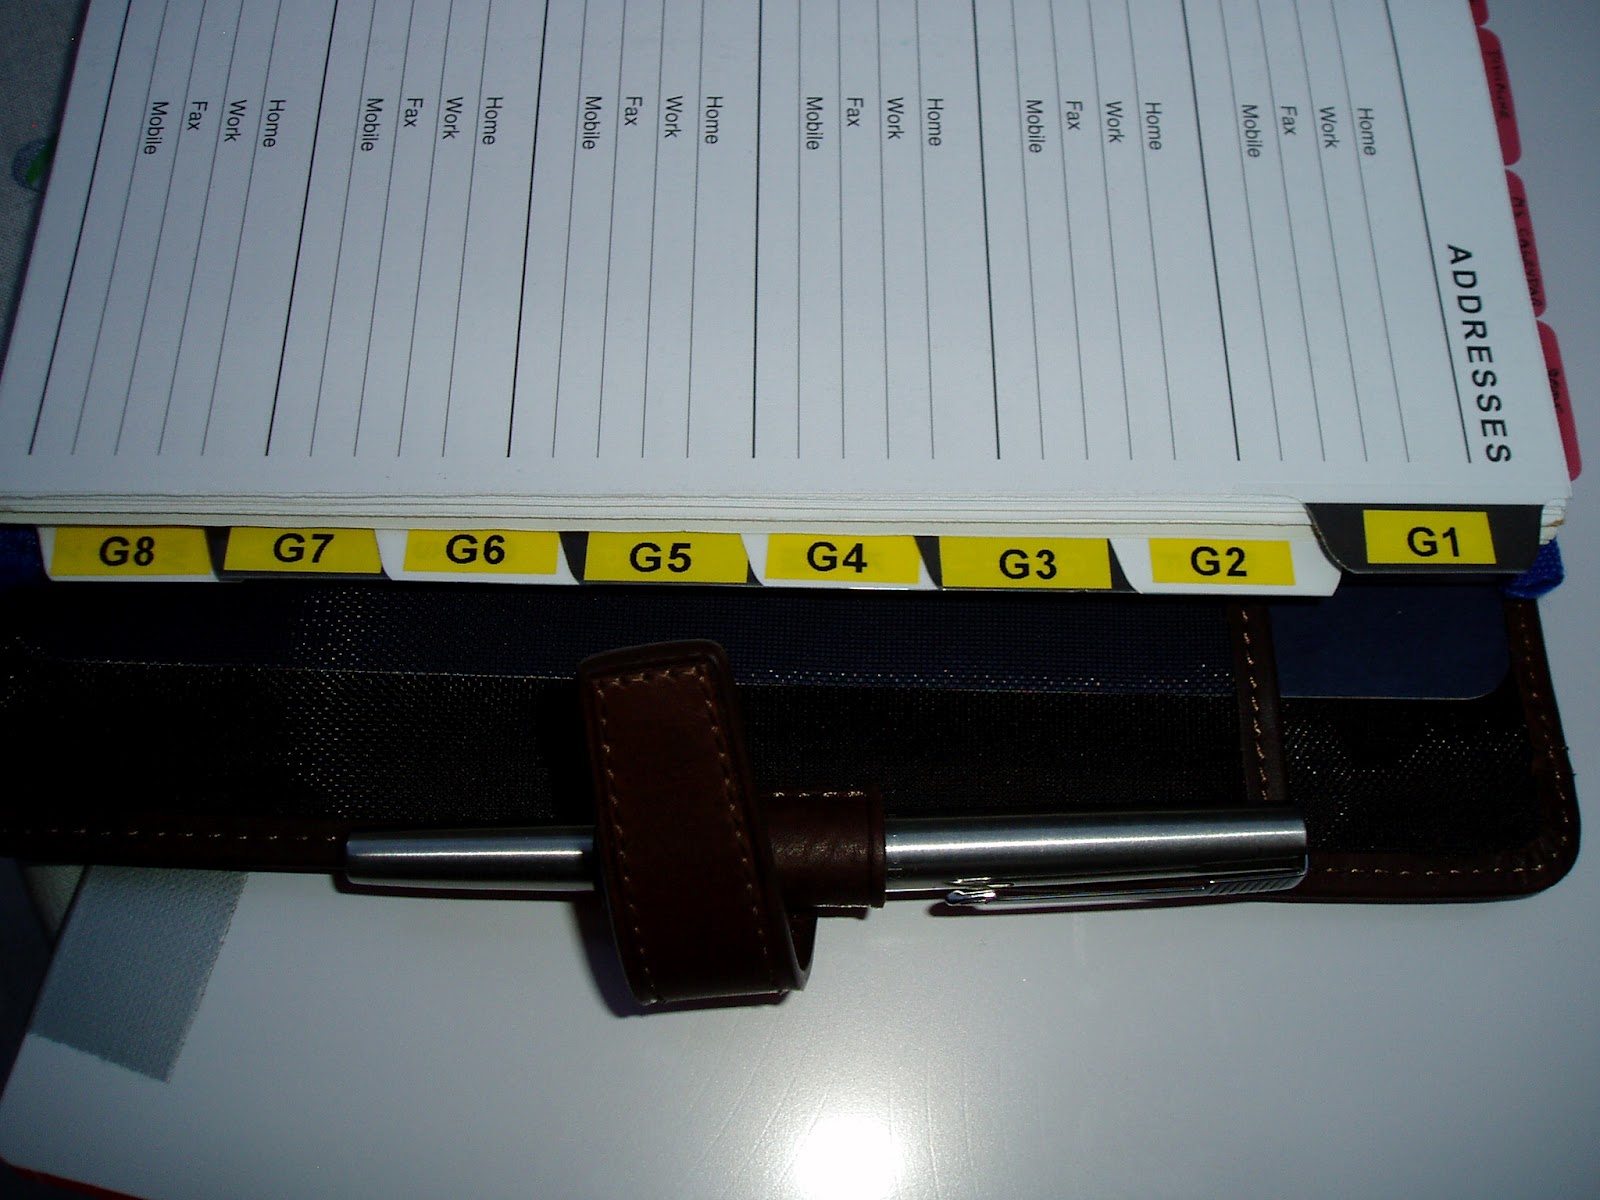
Carry an extra pen: Obtain a Filofax Flex slim pen holder insert. Trim the top and bottom, so the pen loop is central and punch to fit. Voila!


Handwriting:  I use a 0.1 mm black ink drawing pen to write, along with pencil for the diary. When taking notes, small handwriting is still neat and tasks can generally fit onto one line of a Pocket sized page.

Make things stand out:  Being slightly cramped, in pocket size, sometimes your writing can look a bit jumbled. Go over completed tasks with a blue highlighter. Your incomplete tasks will be far more obvious than trying to identify tasks without a line through them. Use Post-It style page flags to highlight important stuff. Write on the flag and put it wherever you need to. (I use them to highlight important dates or tasks).


Diary Size:  To prevent the diary from being too cluttered, using pencil means that you can erase and rewrite, which takes up less room than scribbling out and writing a second time. I also use Post it flags to alert me to impending important events that may get lost. When things get really busy however, I may print out a week's worth of 2DPP and insert it where required, giving me more space. This format is available free from Philofaxy, making it ideal to to mix and match at no extra cost.

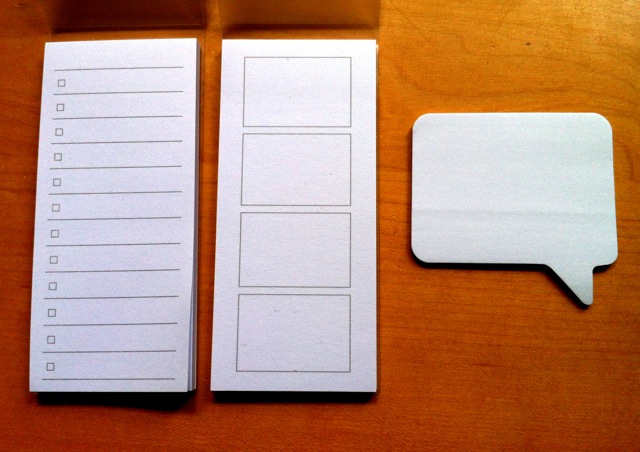
Daily Overview:  To enable me to concentrate on the day itself, I cut a single page of Pocket Sized paper in half and annotate the day's appointments on one side with key tasks on the other. Again, if things are really busy, a full page is more than enough. Following a recent idea by Ray Blake of My Life All in One Place however, I am tempted to hack his handy tasks tab with times down one side and use it instead of the today marker.


Over the years, this system has served me well. During the last 18 months however, It has been tested to its limits. It is during this time that I have experimented the most in order to try and improve it and I think that this has helped me get the most out of the system. I think that everyone's Filofax needs are different, both from person to person and from month to month. It is OK to change up and down sizes, or use different inserts as your needs see fit. I often wish that Filofax would take a look at Apple and realise that the App Store brings in most of their money. Filofax inserts could be analogue Apps. In the meantime however, I am glad for the likes of Ray Blake of My Life All in One Place, Steve Morton of Philofaxy and the folks at DIY Planner to help fill a need and provide some inspiration. Thank you for reading.

Marcus Myles

Sunday, 8 July 2012

OTF: Guest post no. 2, Nia's system

Hi everyone!
I'm pleased to say that my OTF series has got off to a great start! 1 fantastic guest post already, another one here for you today, and I have noticed recently the phrase I coined, 'one true filofax', is being used on philofaxy in conversations on Free For Alls! Exciting!
Anyway, here's a guest post from Nia all about her lovely compact Osterley filofax! I'm really interested in how she manages to fit everything she needs into the tiny rings of a compact!

Enjoy!!


My first ever Filofax was a pocket red Finchley which was bought for me before starting my A levels at school, and which I used consistently throughout the two years. I have always been a great believer in the ‘One life, one planner’ philosophy, and find it reassuring to know that everything I need is neatly organised in one place.

I dabbled with various sizes from mini to personal, and many different diary formats along the way however I have always favoured a week-to-view diary. My search came to an end once I discovered the Dodo Pad personal diary insert earlier this year, and absolutely fell in love with it. I can say with confidence that there is no other layout that lets me organise my time quite as well as this one.

In terms of binder size, I waited with anticipation for the compact Filofaxes to become available and finally settled on the compact Osterley in grey. The compact is the ideal size for my needs – as I use a weekly diary layout, I always found the 23mm rings got in the way of writing comfortably in a personal Filofax. This is probably an unusual dilemma amongst Filo-addicts, but I could never fill up a personal sized binder enough in order to make it comfortable to write around the rings!
Oh, and I love that the compact Osterley has two pen loops – I keep a black and red slim Frixion in these.


Kate was curious as to how I use my very slim compact to organise so many different areas of my life, here is an idea of what I keep track of:

·         Part-time job – shifts, holidays, overtime
·         Part-time business – client contact details, website, jobs
·         Study – working towards an AS level qualification, and a diploma through work
·         University – preparation for applications, work experience, revision for entrance exams, deadlines, interviews
·         And I try to leave some room for a social life!

Here’s how I manage it:


This is the dashboard of my Osterley: it’s where I keep general information that I need to access like my business cards, post-its, any receipts I need to keep.
Inside the clear envelope is a photo of my dog, a London tube map and some old Moleskine stickers.
Behind the clear envelope I also have a world map, and all of my important phone numbers just in case I lose my phone and have no access to the Internet.
Oh and I just have to show off these sticky notes:


The rectangular sticky notes are a new find from Muji, and I love them! I use the one with the four blank boxes on my front page, and write in my four most important tasks/reminders to focus on, it feels less intimidating than a huge long to-do list! The speech bubble post-its are by Tiger. I also use sticky notes for ongoing tasks that I might need to move from week to week in my diary.

Next up is the 2012 yearly planner within my Dodo Pad diary insert, this is where I keep track of annual leave, days I’ve taken off work and any overtime I do. The spaces are absolutely teeny but they do the job, and I have miniscule handwriting.


Behind my first ruler is the current week in my diary, here is how I use the grid-layout to organise my time each week. Each cube is a 3-hour block of time, so the first 5 columns cover the time period 8am-8pm.
The arrows are my shifts at work and longer periods of study that I plan around these times, around which I slot in any dog walks or pet-sits that I’m doing that week, as well as exercise and other fun things.
As you can see I don’t write masses of detail in the boxes, my work rota stays mostly the same week to week, and I know which animals I’m working with at any one time so I would just write their names in the appropriate time slots and refer to my ‘Pets’ section when necessary.
I use the 6th column of the grid for any reminders or things I mustn’t forget that day.
The blank left hand page is for any more detailed notes on jobs or appointments that week, and for keeping a record of any important tasks completed/phone calls made/letters sent so that I’m able to chase things up.


My next ruler is a make-shift tab, and is labelled ‘Uni’. Here are some reference pages with UCAS log-in details, information on application deadlines, feedback I received from last year’s interviews, notes that might help me for next year etc. Just in case you’re curious, I am re-applying to study Veterinary Medicine which is possibly the most (or at least one of the most) competitive courses to get onto in the UK. There are a lot of deadlines and hoops to jump through, so this section is to help me keep on top of that. I also have information on overseas courses and their application deadlines as well.


After this I have my ‘Pets’ tab where I keep all of my reference information relating to my little business. I have client addresses and contact details, pets’ names and things I need to remember for regular clients. I also keep a list of my up-to-date prices in case I get a call when I’m away from my computer. This section only contains around 5 sheets of paper so it takes up hardly any room, and yet has all the information I might need on the go.  


My last two tabs are dedicated to study. The first one is ‘Maths’ and is where I record my progress through the AS Maths course that I am studying for independently. One thing that has helped enormously is discovering Workflowy.com. It allows you to create multiple to-do lists with as many sub-sections as you like, to tag particular tasks with a certain word or a person’s name if you’re working on a group project, or just to keep track of which items you complete along the way. The way I use it is to enter the raw information into it (module name, chapter numbers, exercises within each chapter) and print it off to put in my Filofax. I then cross through items as I complete them which seems almost too simple, but I find it an effective way of working.
This way I can always see how much I have left to cover, and work steadily through my list. I also write the date I start and complete each section, so I can see that I’m still on track.
So every time I write ‘maths’ in my weekly diary grid for example, I just refer to this section and carry on where I left off.


My final section is where I record my progress through the diploma I’ve just started with work – It’s a distance learning course, so I do something similar using Workflowy and enter every single task within each module to create a huge long bullet-point list. I also printed my full course specification so that I can refer to this when I need to.


The key to making this system work for me is just keeping it really simple, and figuring out what I need my Filofax to do for me. The Dodo Pad allows me enough space to organise my day in chunks of time so that I feel like I’m getting the most out of each day, and the blank page still allows me to write a fair amount of detail each week which is useful to refer back to.
My uni and business sections are needed mainly for reference, and my study sections are just for keeping track of my progress in a neat, easy way. It all requires very little effort to keep on top of, and there’s no need to sync information between different Filofaxes.
I use my iPhone for a couple of things like keeping track of money; it makes more sense to use a clever app on the go than having to whip out my Filofax each time I buy something. Everything else however is written down in my Osterley.


Thank you for reading!

Saturday, 17 September 2011

All Stars Blog Tour: Guest Post by Angela!!

Hi everyone!
Sorry for my lack of posts lately! Unfortunately I don't have wifi in my new house yet, so I can only post when I'm in the library. Thankfully, Angela from Paper Love Story has a great guest post for you to read about her experiences using both Filofaxes and a Moleskine diary at university. If you haven't seen her gorgeous collection of personal sized Finchley filofaxes, please visit her blog!


Going into my third year of university, you’d have thought I’d have my planner problems sorted by now… but I don’t. For my first year, and for the first two terms of my second year too as it turns out, I used a Filofax. I started with a Raspberry Finsbury, changed to a Vintage Rose Finchley, changed once more to a Jade Green Finchley and then reverted back to a Vintage Rose Finchley for the second term of my second year. Further changes ensued when I got a Moleskine on the cheap in March and so commenced its use for the third and final term of my second and penultimate year.

Did this switch cause my productivity to increase? Far from it, it seems. My best exam marks were when I had used the various Filofaxes! Why was this? Well, one of these reasons may be the fact that the Moleskine layout was a day per page whereas my Filofax diary layouts had always been the ‘Week on Two Pages’ (in cotton cream of course). This extra space meant I scheduled more things to do on a daily basis – whereas the Filofax layout forced me to limit any activities I wanted to plan that were not related to study.

This is how a week looked with the Filofax inserts:


You can see that it’s pretty crammed with writing. I write in when my lectures are, and what lecture number they are too just to make sure I bring the right set of lecture notes with me. Television show episodes that need watching (the day after airing in America usually) are written in with colour to add a bit of spice to what would be a boring looking week. Sometimes, I also plan my outfits in advance – this may seem strange to some as students are commonly regarded as hoody and jeans wearing youths; but living in London has caused me to dress as a bit smarter than I may have otherwise done. Not to mention the fact that London is a fashion capital of the UK too (controversial, maybe but I have to stick up for the city that I so love – but is also flawed in many respects, i.e. public transport!).


Here is a page of my to-do list from February 2011. Long term, short term and urgent (immediate) things are filed into those categories so that more important tasks are done first. I’ve lost this system of organisation since I got my Moleskine though and as a result, my time management and life admin productivity has also gone down. Knowing this now though, I can use Amanda's time management post to good use to try and incorporate my previous system with the use of some of her tips too.

In comparison, here is how a day looked in my Moleskine.


See the bareness? This bareness leads me to schedule things in that I wouldn’t have done previously with my Filo and this lead to me leaving barely any time for study in the summer term! I ended up messing around a lot with socials and other stuff.

Again, lectures and lecture numbers are written in, as are things such as ‘what I wore’ and vitamins I need to take, etc. Writing in what I wore that day helps with my decision about what my wardrobe is missing (nothing it seems) and what I don’t wear (a lot). This enables me to decide what to sell on eBay and what to keep.


I can’t seem to find a page where I have written in coursework stuff – maybe it didn’t exist in my Moleskine. It does in my Filo though but unfortunately, I’ve filed away the pages already so I can’t show you. As mentioned in a previous post of mine, I did use notecards to help me organise coursework.

Overall, I had more success with my Filo(s) than I did with my Moleskine. But, this is due in part to the layouts of the two, rather than the fault of the brands themselves. Also, the Moleskine is a boring black colour whereas my Filofaxes are of interesting and lovely colours – not that I’m relating design of a planner to productivity… Ok, maybe I am but just a little!

Conclusion

A day per page Moleskine (the large size too!) is probably not the best for a student wanting to increase productivity – a week per page with the opposite page for memos and notes is probably better.

http://www.mojolondon.co.uk/a/i/products/800/moleskine_soft_cover-18month.jpg

The ‘Week on Two Pages’ layout for the Filofax works fine – there is enough space to write when lectures are, when tutorials are, etc. Obviously, this is providing your lecture venues don’t change as mine didn’t and were always in the same place for the first two years. Next year though, my lecture venues may be different for successive lectures so we’ll see if I’m still saying the same thing in December (at the end of my first term).


If you are still to decide on what diary to use for 2012 or if you're itching to change, my only advice is to seriously consider what you want out of your diary. I initially thought a large space to write daily tasks and other stuff would be great - turns out, it was not so great for my studies! If you, like me, think bigger is better for diaries, then I'd urge you to honestly ask yourself, 'Do I really need all this space?' - something I really regret not doing, myself! But, as they say, you learn from your mistakes and I've certainly learnt from this one - that day per page large Moleskines aren't for me.

Sunday, 11 September 2011

All Stars Blog Tour: Guest Post by the fantabulous Imy!!!

Hi everyone!
Today I am very pleased to present to you the very first guest post on this blog, written by the wonderful Imy of Imysworld! She's a lovely girl, and adores all things pretty and cute! She is famous in the Philofaxy world for her fantastic youtube videos, which I urge you to check out! She love love loves filofaxes, and with a much more creative brain than me, she manages to customise them brilliantly to make them look beautiful! I really want to make my own filofaxes much cuter and more 'me', so slightly selfishly I asked her to do a guest post on my blog about how she customises her filofaxes!
Enjoy!!

For Philofaxy All Stars, Kate requested I do a How to Customise your Filofax post! And as I love to customise my Filofax I jumped at the chance!
    As you all know I always have lots of ideas of customising my  beauties but I NEVER get around to doing most of them!
    One of my first and favorite things to do is customise the Ruler/Today marker, as it is always so boring, I always try and order a second one, usually a clear one!
    Then I always visit my favorite online shop, Modes4u! (well I have not visited it in AGES as I have had no money) but I love to go on there and look at all the Deco tapes!
    As you do not want to have your ruler with lots of bumpy things on it I like to just use tape, as its smooth and it looks pretty and its very simple to use, depending on the width, I either use a two strips of thin and line it up so it looks seemless or I use one thicker. I like to have a different pattern on both sides of the ruler so it doesn’t look too boring and plain.
    Here is a video about me customising my ruler, as it shows it best!

After I have done my ruler I like to start to create some dividers, but this is the one thing I’ve struggled with recently, I’ve been looking everywhere to get some REALLY pretty card, but it seems to be non-existent where I live!
    So if anyone knows any amazing online shops that sell the perfect pretty card for dividers let me know!!
     Well at the moment I have used some Wilkinsons card that was covered in glitter.


Anyway, DIVIDERS ARE SO EASY TO MAKE!!!! Click here to see my blog post on how to do it!
    But the only thing I will say is, it works so much better if you use a craft knife, metal ruler and board to make sure you don’t mark your table, which is easy to do (and if your under 16 get your PARENTS to do it, I’m 21 and still got my parents to do it) hehe
    You can also just personalize your dividers which come with the Filofax, watch this video I made to see how I did it!


You can also find some really pretty note paper and hole punch it so you don’t have to have plain paper and can have something really cute and girly!
    The possibility of customising your Filofax has no end you can do anything you want!

Hope you have enjoyed my guest post!


 Thanks so much Imy!

 Be sure to look out for my 'What's in my bag' guest post on Imy's blog soon!